Bankful Native Subscriptions offers seamless integration with Woo, designed to make managing subscriptions easier for you and your customers. This article will go over some of those features and how to perform various tasks from within the Bankful Subscriptions Dashboard.
Bankful Subscriptions Dashboard
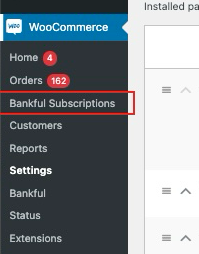
- You will locate your Bankful Subscriptions dashboard in Woo under “WooCommerce” → “Bankful Subscriptions”
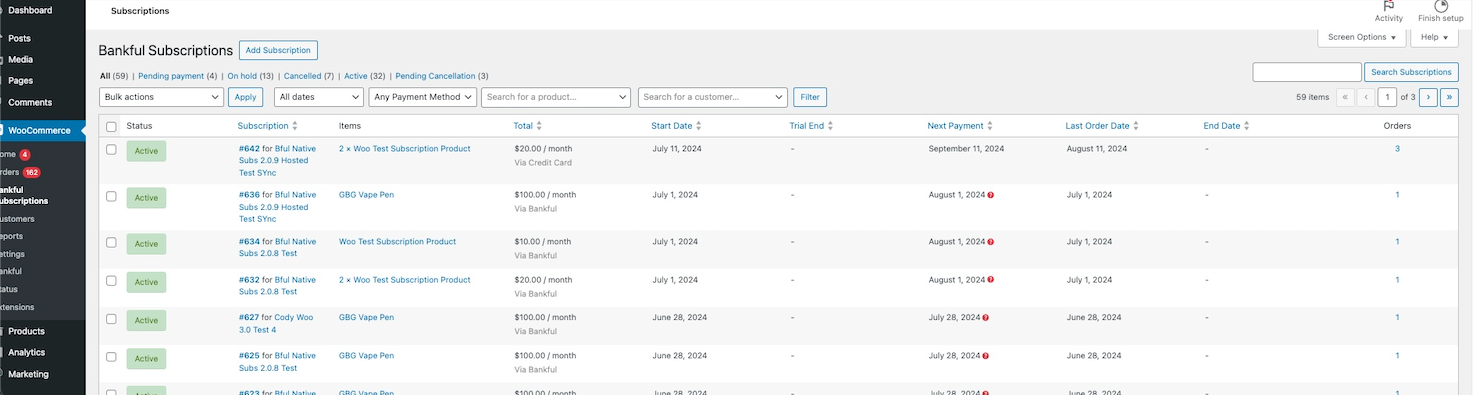
- Here you will see the existing subscription information for current customers along with other features such as:
- “Add Subscription” which allows you to create a new subscription yourself from within the dashboard.
- Various filtering options that are available to help with sorting subscriptions by customer name, products a customer is subscribed to, and date ranges. You will also be able to switch between All, Active, Pending, On Hold, and Canceled Subscriptions.
- A list of subscriptions along with the customer information including the status of the subscription, customer’s name, subscription start and end dates, next renewal date, and the amount of orders so far on that subscription.
Creating a Subscription with Bankful Subscriptions
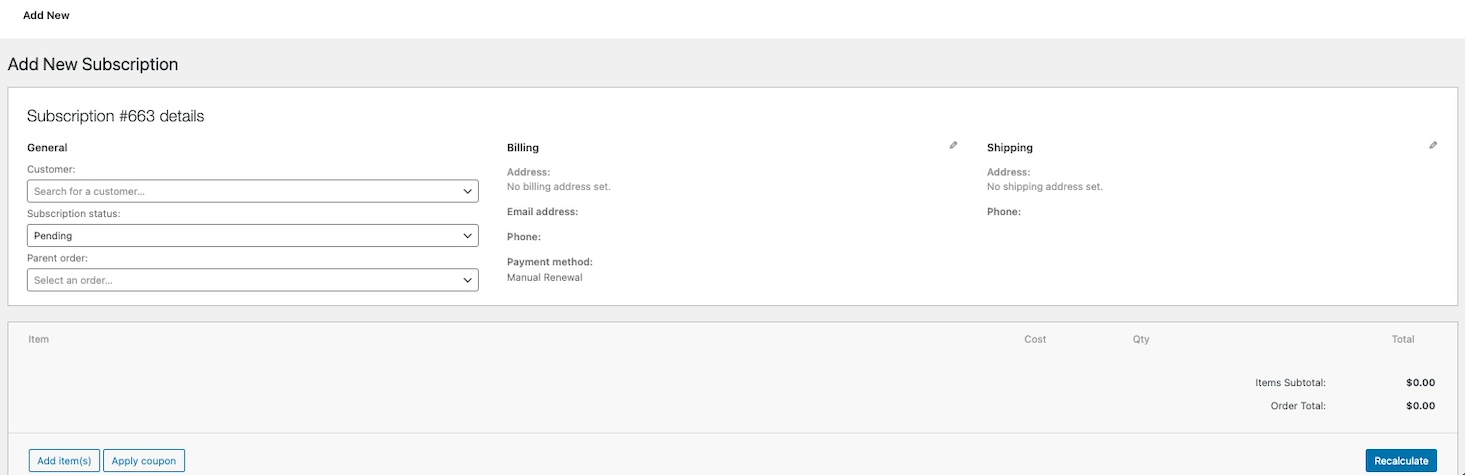
If you need to create a subscription on behalf of the customer, navigate to the Bankful Subscriptions dashboard and click “Add Subscription.”
Customer Information
- Begin by filling out the billing and shipping information for your customer.
- For existing customers, you can search through your database under “General” to locate a specific customer. Selecting a customer this way automatically fills out the customer’s billing and shipping information using what is already stored in Woo for that customer. This can be manually edited by selecting the pencil icon.
- If the subscription is for a new customer, click the “Edit” button.
Adding Items
- Now, add items or products to the subscription by going to the “Items” section and clicking the “Add Item(s)” button. You may also add a discount by clicking “Apply Coupon.” You will see a running total of the current items in the subscription, located on the right.

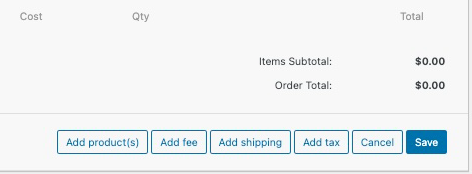
- Once you click on “Add Item(s)” you can start adding products to the subscription order. New buttons will appear allowing you to add products as well as any additional fees that may need to be applied to the subscription.
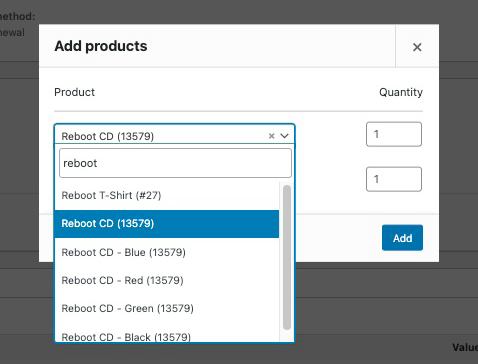
- Click on “Add Product(s)” to see a window with a drop-down bar allowing you to search your products. After selecting the appropriate product, update the “Quantity” of the item, and continue to add additional products, if needed.
- When done, click “Add.”
Setting the Recurring Schedule
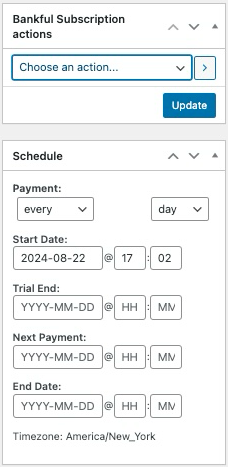
- After the products are added to the subscription you’ll need to set the recurring schedule for this subscription. These options are located on the right.
- Scheduling the frequency is flexible and can be set to daily, weekly, monthly, every couple of months, or annually.
- When the frequency is set we need to make sure we select the “Start Date” and “Next Payment Date”.
- The recurring schedule is now set.
Additional Features
- When we have the customer information, products, and scheduling set up for the subscription it is ready to be created, however there are some additional options for the subscription.
- In the bottom right you can see the list of current “notes” on the subscription and can even add a new note to the list.
- You can also add additional “Custom Fields” to the subscription to further customize the specific subscription and add more details and/or metadata.

Finishing the Subscription
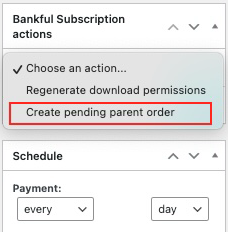
- Once everything is filled out you can create the subscription by navigating to the top right and clicking on the drop down “Choose an Action” in the “Subscriptions Actions” section.
- Click on “Create pending parent order” and then “Update” to finish.
- You will then see the order listed at the bottom for this subscription. This will be where all future orders associated with this subscription will be located.

Creating a Subscription Product
You will need to set up your products appropriately to allow a customer to sign up for a subscription for that product. First go to “WooCommerce” → “Products” and select a product or add a new product to set up for subscriptions.
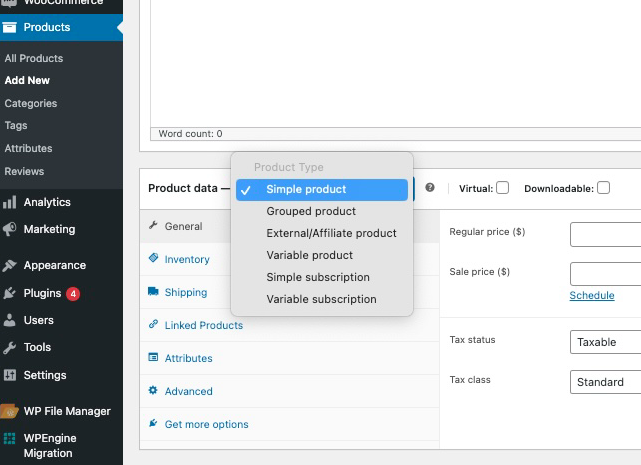
- To make the product available for a subscription, scroll down on the product page to the “Product Data” section and click on the drop down menu.
- You have two options for subscriptions, a “Simple” subscription and a “Variable” subscription.
Simple Subscription
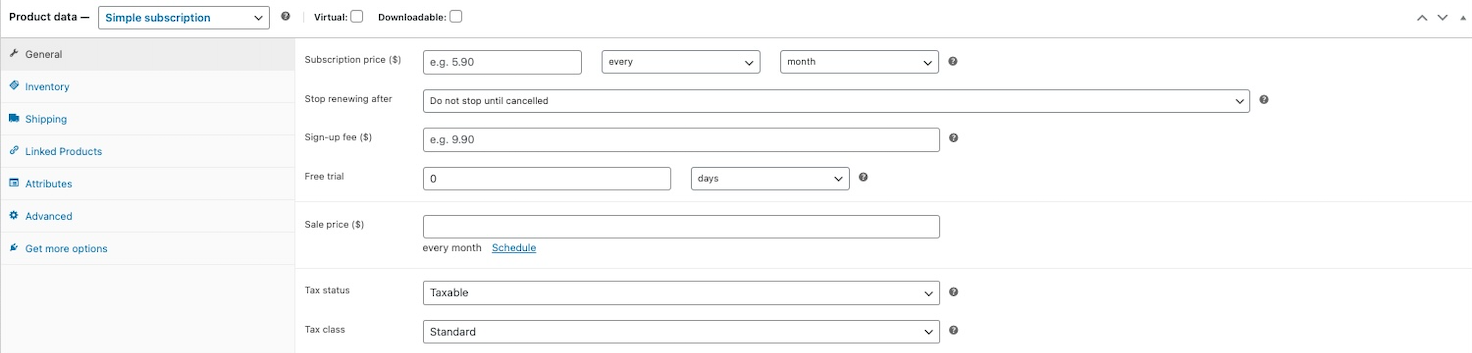
- Select “Simple Subscription” and move into the “General” tab. Here, you will set the pricing of the subscription.
- First set the “Subscription price ($).” This will be the price that the customer is charged on every recurring order for this product.
- Next to “Subscription price ($)” you will find the drop down menu to select the frequency that the subscription will recur.
- You can also add any sign-up fee the customer will be charged when purchasing the initial subscription and select the amount of time a free-trial for the subscription can last if applicable.
- Use “Sale price ($)” to set a discounted rate for the subscription. You can also schedule certain periods of the month when the product goes on sale.
- After the pricing is set the way you would like, you will go to the top right to the “Publish” section and click the “Update” button. You may also first click on “Preview Changes” to see how the product will be displayed in your store before publishing.
Variable Subscription
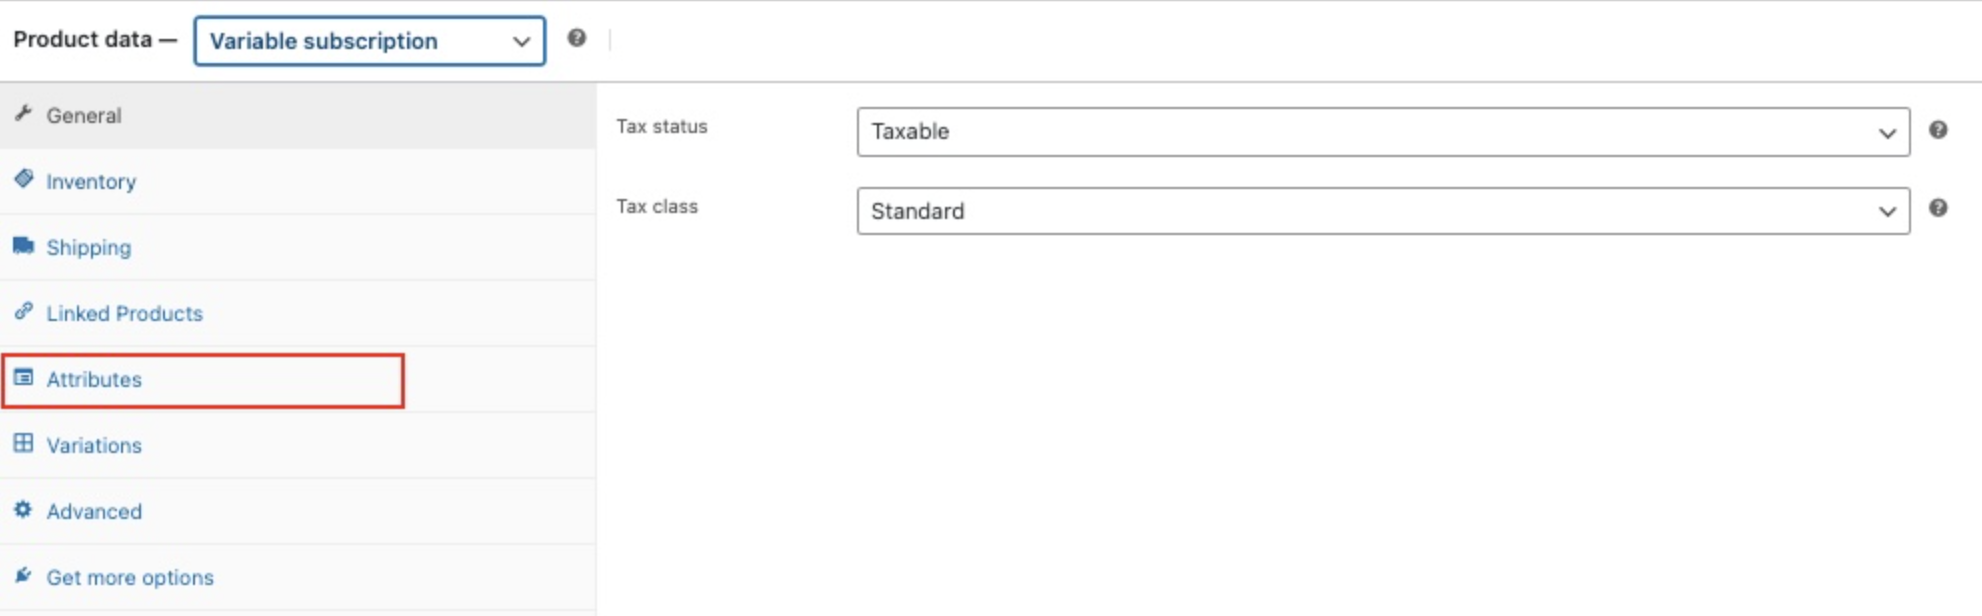
If your product has different variations, such as color or size, you’ll need to create a variable subscription for that product.
- After selecting “Variable Subscription” click on “Attributes” on the left hand side.
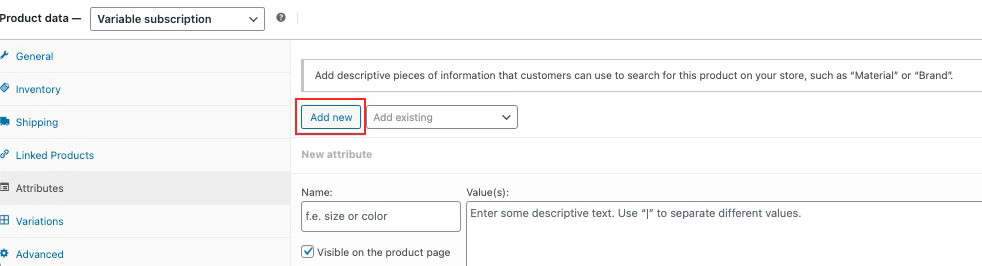
- Click “Add New.”
- In this section you will name the attribute (color, size, type, etc).
- Make sure there is a checkmark next to “Visible on the product page”, if you want the product to be seen on your website, and a checkmark next to “Used for Variations.”
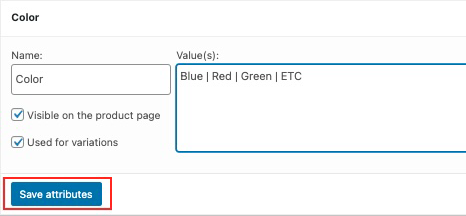
- Now type in the different variations you will have for the attribute. You will need to type a “ | “ in between each different variation so the system will know how to separate each one.
- Click “Save Attributes”
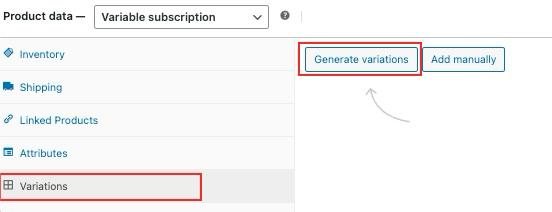
- On the left, click “Variations” and then “Generate variations” to go to the variations that you have defined and automatically create separate, editable, variants.
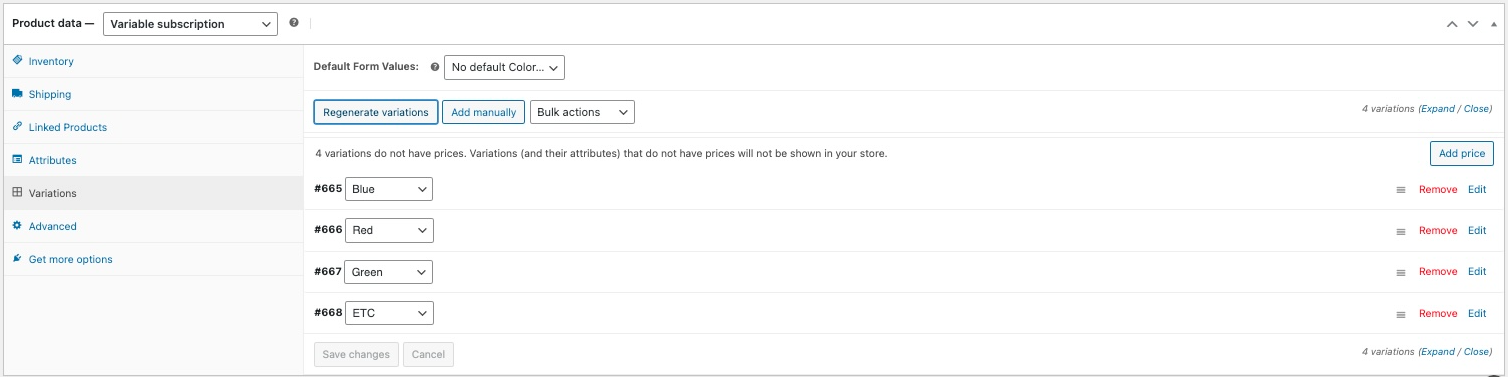
- When the variants have been created you can edit each individual variation to change pricing, descriptions, and other information.
- Click “Add Price” to set the same price for each variant.
- You can also set which variation the customer will see by default by selecting the “Default Form Values” drop down and selecting a variation.
- Clicking on “Edit” next to each variation will allow you to edit pricing, description, and other information for each individual variation.
- Note, each variation needs to have a “Subscription Price” set or the product will show as “Out of Stock” in the store.
- Once all of the variations are set to your liking, click on “Publish” or “Update” in the top right corner of the page. This will publish the product to your website.
Customer Portal
Logging into the Customer Portal
The “Customer Portal” is the customer-facing dashboard that allows your customers to freely manage and make changes to their subscriptions whenever they need to, right from your website.
- Customers will have made an account before or during the purchase of their subscription. The account details will be sent to the email the customer used when creating their account.
- To access the customer portal, the customer will click on the appropriate link on your website to login to their account. (i.e. “My Account,” “Login,” “Manage Account,” etc)
- They will be greeted with the login page and asked to enter their credentials.
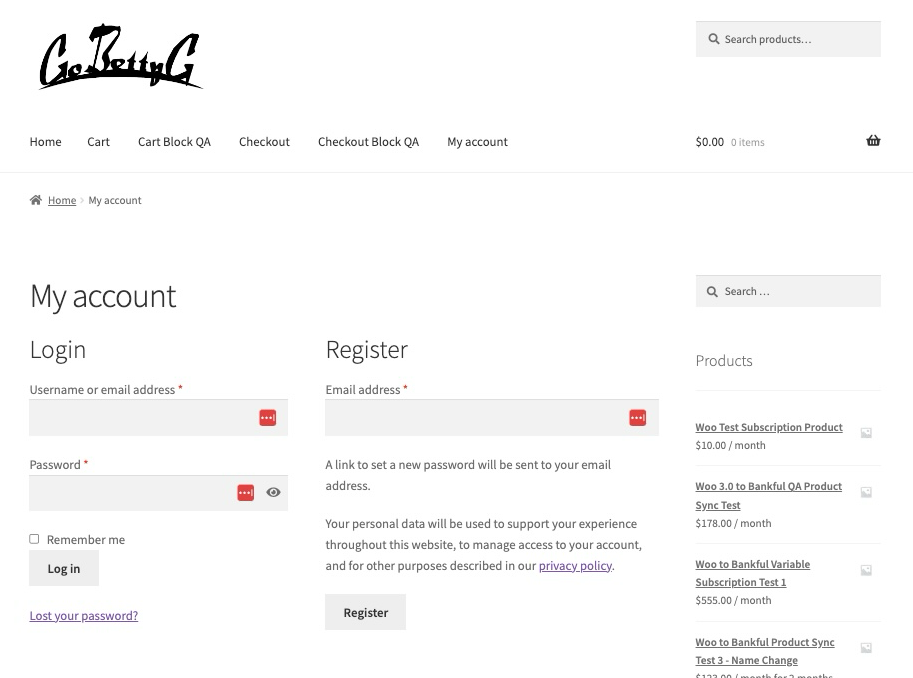
- Once logged in the customer will be presented with the “Dashboard,” the customer portal home page.
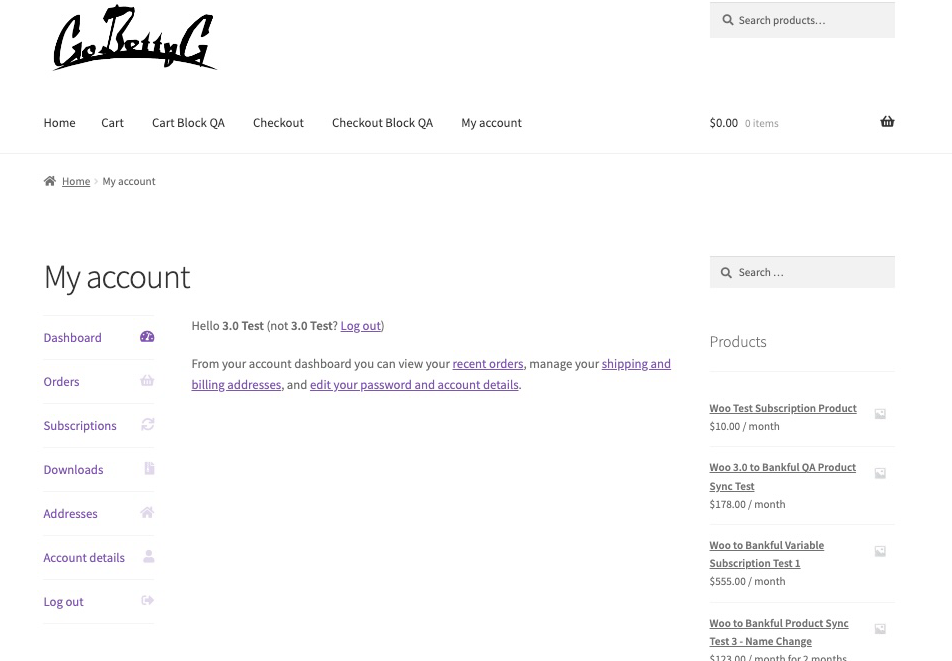
Customer Portal Features
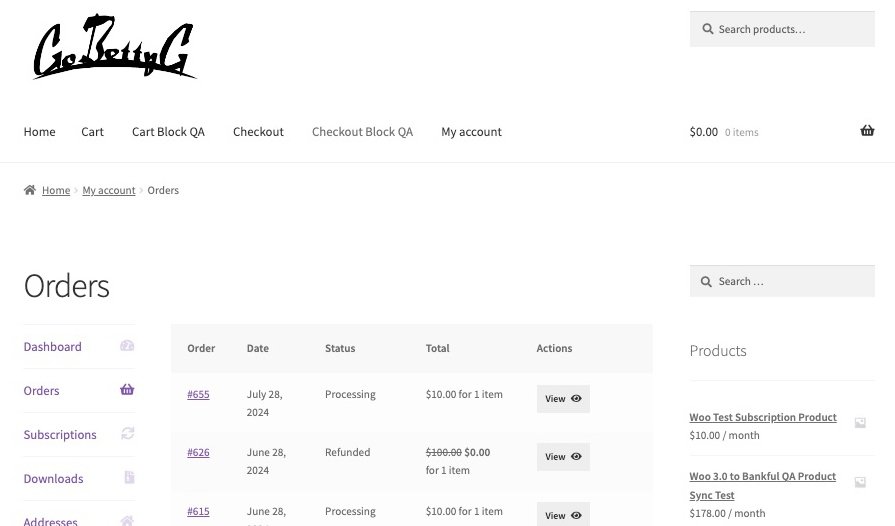
- Clicking on “Orders” will show a breakdown of the orders placed by the customer that are associated with the account and the status of the payment for that order (Approved, Processing, or Declined)
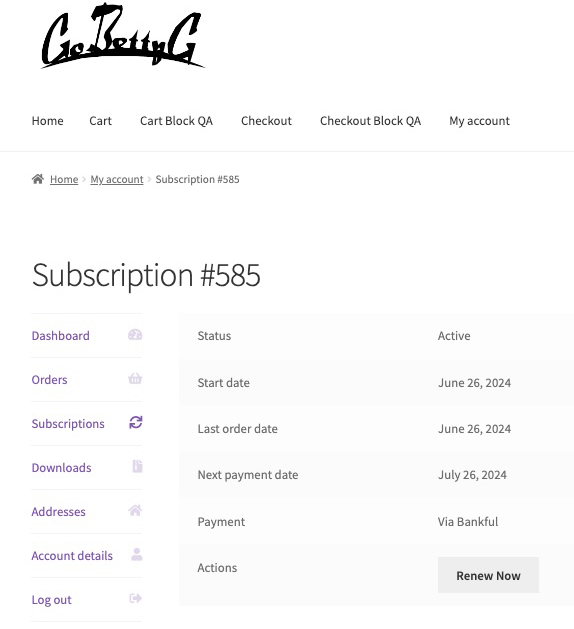
- Clicking on “Subscriptions” will show the customer all of their active and inactive subscriptions for the account as well as the price, frequency, and next payment date of an active subscription.
- Customers can see more details by clicking the order number or “View” button.
- Customers will have the ability to “Cancel,” temporarily “Suspend,” or “Renew” the subscription.
- “Downloads” will allow the customer to download any “Digital Goods” that they may have purchased during the lifetime of their account.
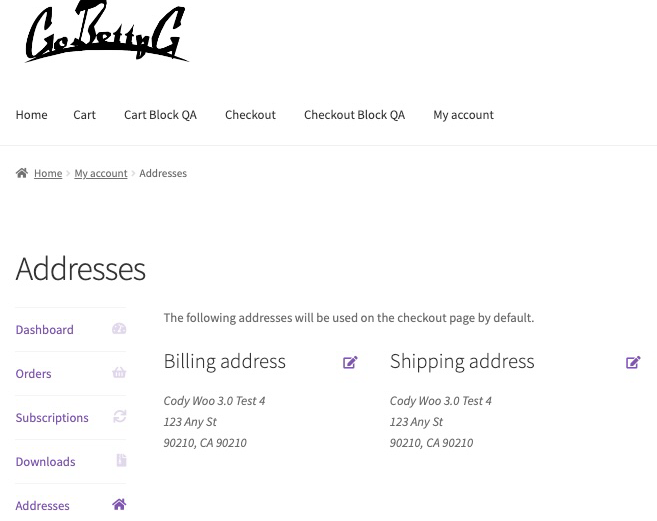
- “Addresses” allows the customer to update their “Billing Address” and “Shipping” addresses whenever they may need to do so.
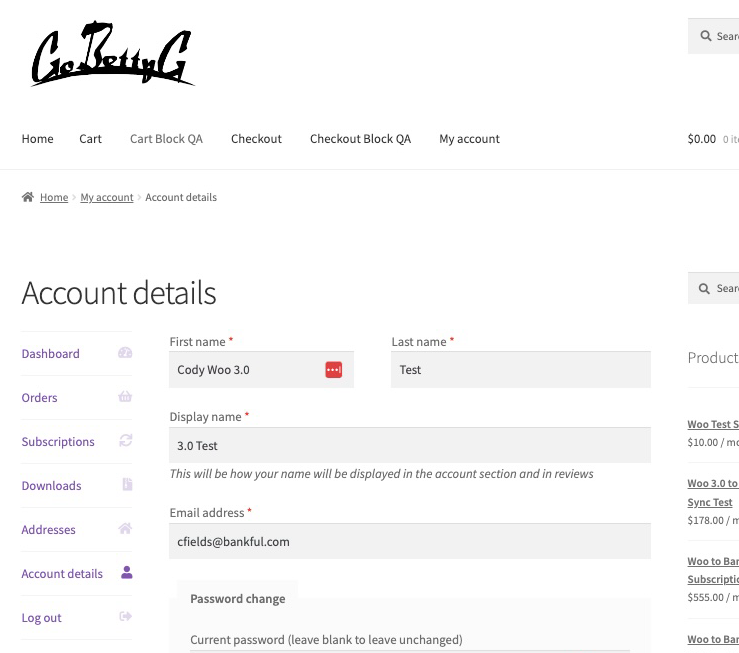
- “Account Details” lets the customer update their first, last, and “display” name. They can also update their email address and password for the account. The password can be changed after confirming the current password and entering the new password twice.
- Finally, “Log Out” will simply log the customer out of the account.
Discount Code Generator
Woo has a built-in feature that will allow you to create discounts and coupons that can be sent to your customers or used in marketing campaigns to entice customers and drive more business.
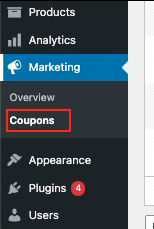
- You can locate this feature in Woo by navigating to the left hand side and clicking on “Marketing” → “Coupons”
- This will take you to the coupons dashboard where you can manage your existing coupons. To create a new coupon click on “Add Coupon.”
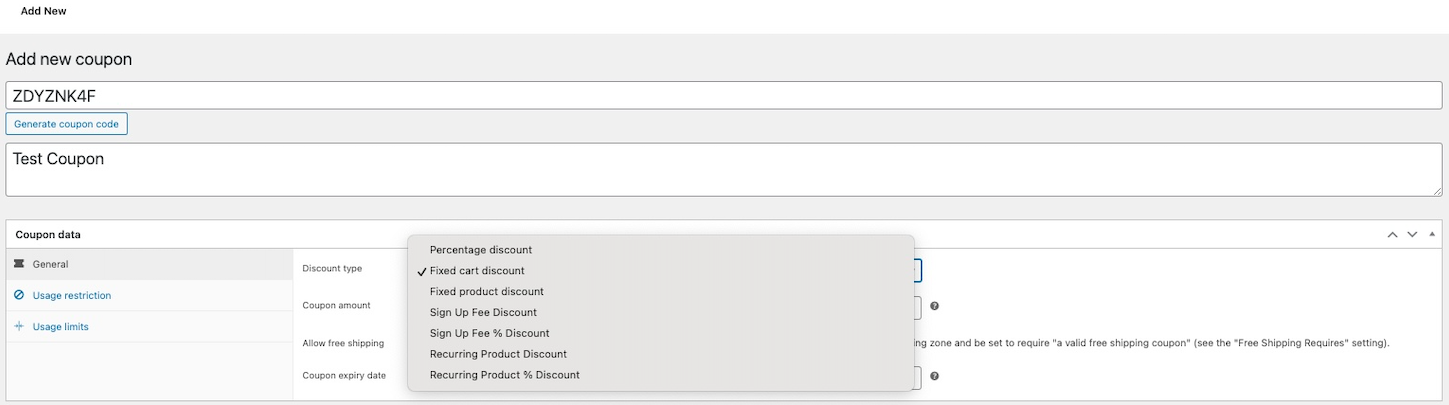
- Start off by naming your coupon. You can choose a custom name for the coupon or you can generate a random coupon code automatically by clicking “Generate Coupon Code.”
- Fill out a brief description of the coupon in the description section.
- In the coupon data section, click on “General” and select what type of discount you would like to set the coupon as. You can set percentage discounts, discounts for individual products, discounts on the entirety of the purchase, and/or discounts for subscriptions and sign up fees.
- Once you select the type, fill out the “Coupon Amount” to reflect the amount of the discount. For fixed discounts this number will be the amount in “$” that is discounted and for percentage discounts will be the “%” that is discounted on the purchase.
- You can also set this discount to include “free shipping” by clicking the checkbox next to “Allow Free Shipping.”
- Lastly, set the expiration date for the coupon. Leaving this blank allows the coupon to remain active until deactivated.
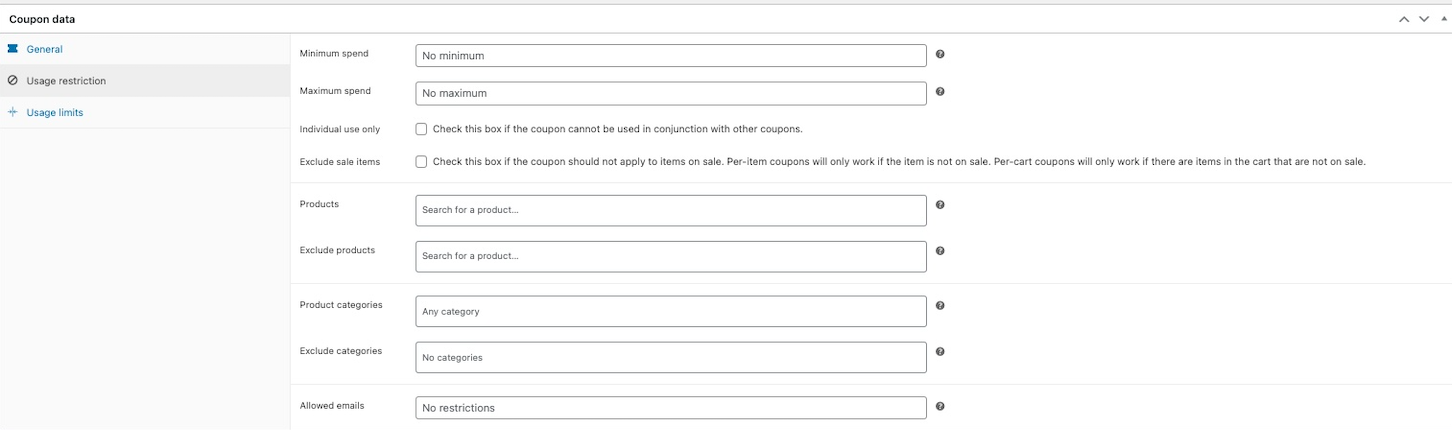
- Next click on “Usage Restrictions” under “General.”
- Here you can set restrictions on what the coupon can be used towards and also set minimum and maximum restrictions for the coupon.
- The “Minimum/Maximum spend” can be set to restrict the coupon to only be eligible for a minimum amount or set a maximum amount that coupon can be applied to. Adding a value for both will create a range that the coupon will be eligible for.
- Checking “Individual Use Only” will prevent the coupon from being used with other coupons.
- “Exclude Sale Items” will prevent the coupon from being used on any products that are marked by a “Sale” tag. Check your products individually to see if there is a sale set up for the product.
- The “Products” field will allow you to select individual products that you would like to be eligible for the coupon or you can add products to the “Exclude Products” field that you do NOT want the coupon to be eligible for.
- “Categories” will allow you to select whole categories that you would like the coupon to be eligible for and the “Exclude Categories” field can be used to select which categories you would NOT like the coupon to be eligible for.
- “Allowed Emails” can be used to restrict the coupon to only be applicable for specific billing email addresses on file. You can also apply the coupon code to whole domains by adding an * before the domain. (Ex. *@gmail.com). By default this is set to “No Restrictions.”
- Click on “Usage limits” to set simple limits on the use of the coupon.
- Setting a value for “Usage limit per coupon” will limit the number of times the coupon can be used.
- Setting a value for “Usage Limit Per User” will put a limit on how many times an individual user can use this coupon. For guests, this uses the billing email address, and uses the User ID for logged in users.

- After all of the information for the coupon is complete, go to the top right section of the page and click on “Publish” to set the coupon to live.
Bankful Cloud Sync Features
With our new Bankful 3.0.1 Plugin for WooCommerce, we are happy to announce the addition of our “Bankful Cloud Sync” feature and our cross-platform subscription capabilities. Now, by default, subscriptions that are made within WooCommerce using the Bankful 3.0.1 app will be automatically synced to your own Bankful Cloud. This means that these subscriptions can be managed from either your WooCommerce Dashboard or your Bankful gateway’s dashboard.
Subscriptions from other platforms, such as Shopify, that are stored in the Bankful Cloud will automatically be synced and accessible from WooCommerce as well.
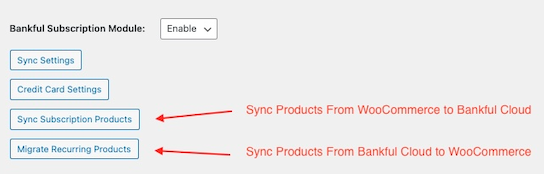
You may also manually sync products from your Bankful Dashboard to WooCommerce and vice versa:
- Navigate to “Plugins” on the left hand side of the WordPress dashboard.
- Click on the “Bankful” link within the Bankful plugin.
- Scroll down to find “Sync Subscription Products” and click this option to sync any new subscription products created in Woo over to Bankful.
After a successful sync, a message will appear confirming the changes.
To sync from Bankful to Woo:
- Navigate to “Plugins” on the left hand side of the WordPress dashboard.
- Click on the “Bankful” link within the Bankful plugin.
- Scroll down and click “Migrate Recurring Products.”
After a successful sync, a message will appear confirming the changes.
03.24.2025