New Merchant – Installing the Bankful Plugin for Woo
Congratulations on joining our community of merchants! We’re thrilled to welcome you aboard as you install our cutting-edge plugin for Bankful’s services. This plugin is designed to streamline your operations, elevate your user experience, and pave the way for unprecedented growth and success. We’re excited to support you every step of the way, beginning with the following step-by-step guide, as you explore the endless possibilities our technology has to offer. Welcome, and get ready to unlock a new realm of efficiency and innovation for your business!
Step 1
Obtain your API Credentials by accessing your Bankful dashboard
- Log in to your Bankful portal
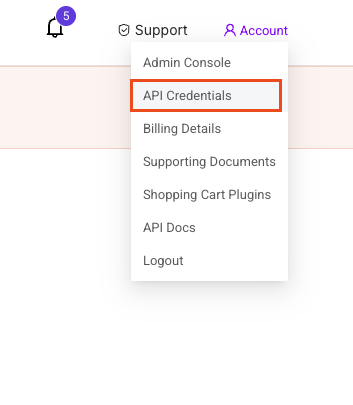
- Click Account in the top right corner of the screen
- Choose “API Credentials”
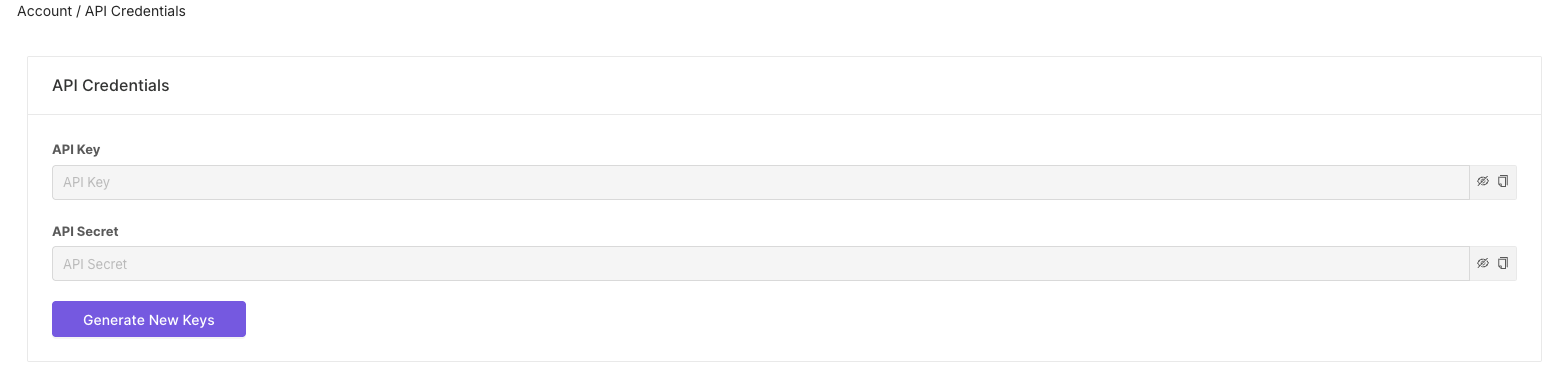
- Copy both the API Key and API Secret by clicking on the copy icon
- *If the credentials are not present, click “Generate New Keys”
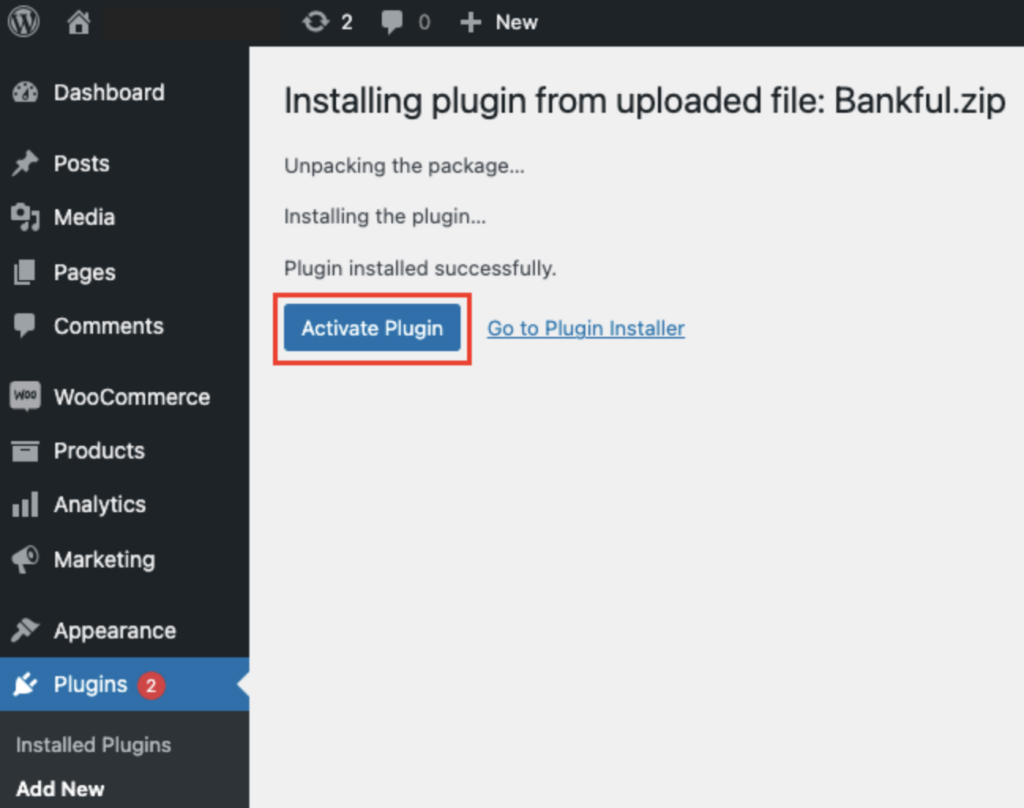
Step 2
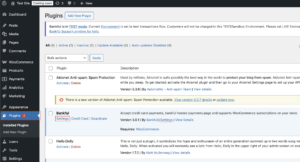
Download, install, and activate the Bankful Plugin
- Download our bankful plugin
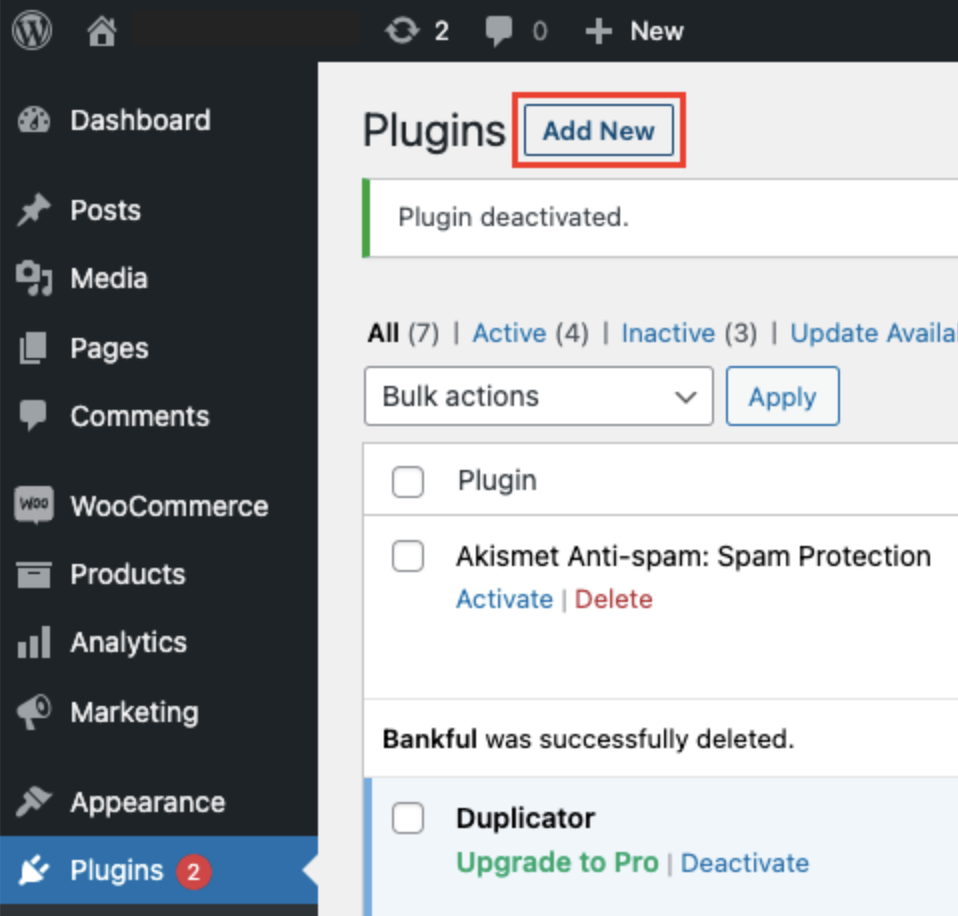
- Log into your store’s WordPress backend and select Plugins from the left sidebar and then “Add New”
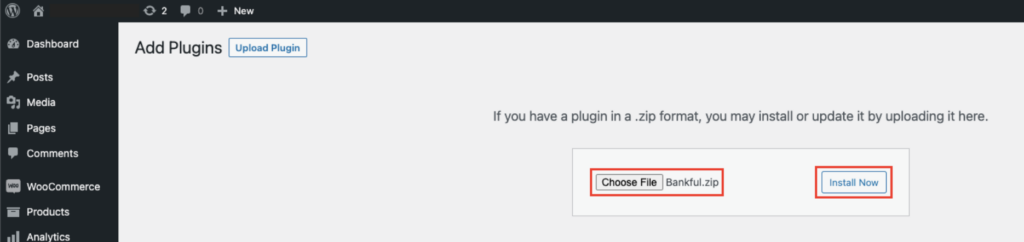
- Click “Upload Plugin”

- Choose the extension zip file and click “Install Now”
- Activate the plugin
Step 3
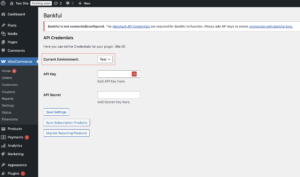
Enter the API credentials within the Bankful plugin in your WordPress dashboard
- Upon activation, you will be prompted to enter the Bankful API credentials you obtained in Step 1
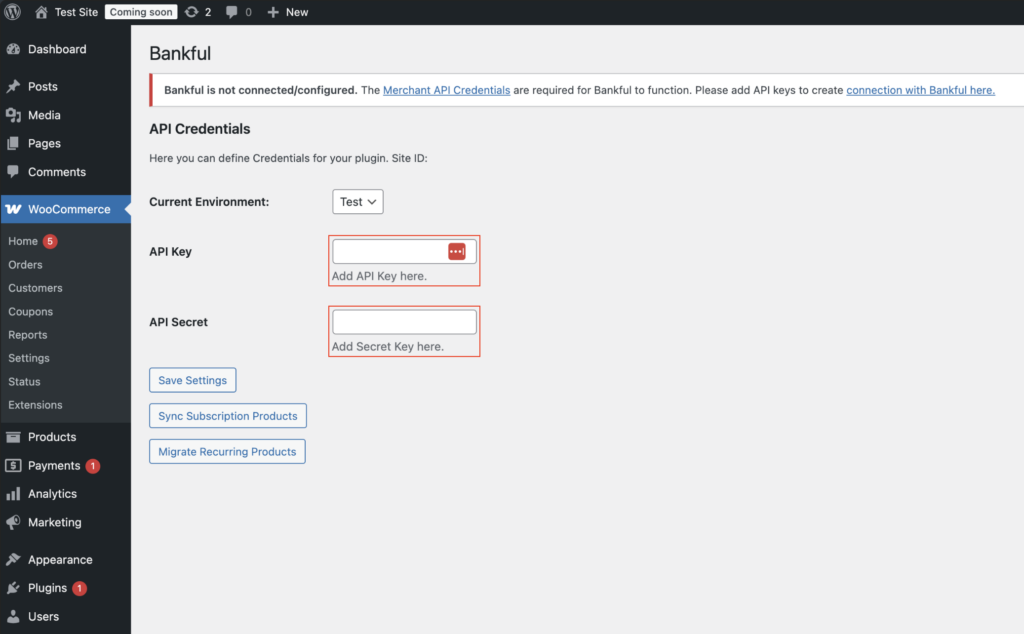
- If you activated but did not enter your credentials when prompted, enter your store’s WordPress backend select Plugins and then “Settings” within the Bankful plugin
- If there is an error message received, please reach out to our support team by entering a support ticket through your Bankful portal
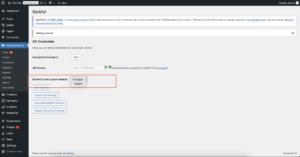
Bankful Plugin Settings
- Integration Type
- Native = Credit Card
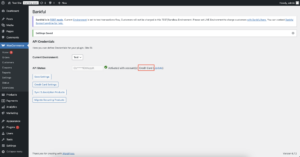
- Hosted = Hosted Page

- Native = Credit Card
- Bankful Subscriptions
- Enabled
- Disabled
*Note – you will not see this option if Bankful Subscriptions are not activated and enabled within your Bankful portal.
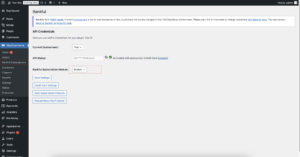
- Test Mode
- You can test transactions in test mode. “Test” mode simulates transactions without actual charges or recording transactions in Bankful.
- Toggle between “Test” and “Live” in the current environment dropdown.
- *The plugin will be in live mode by default.
We strongly advise setting the Customer Email and Customer Phone Number fields to mandatory within Woo. This will help your processing bank verify transactions and help with future chargeback disputes.
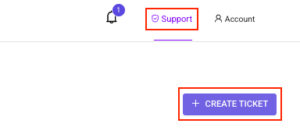
If you encounter any difficulties during the installation process, our dedicated support team is ready to provide guidance. Support can be contacted at support@bankful.com or for accelerated assistance, submit a ticket by following these steps.
04.16.2026