Virtual Terminal
Overview
- A virtual terminal, often abbreviated as VT, allows you to manually enter a payment on behalf of your customer. A shopping cart is not necessary for this feature. This option is commonly used for phone orders, mail orders, and/or trade shows.
How to Access the VT
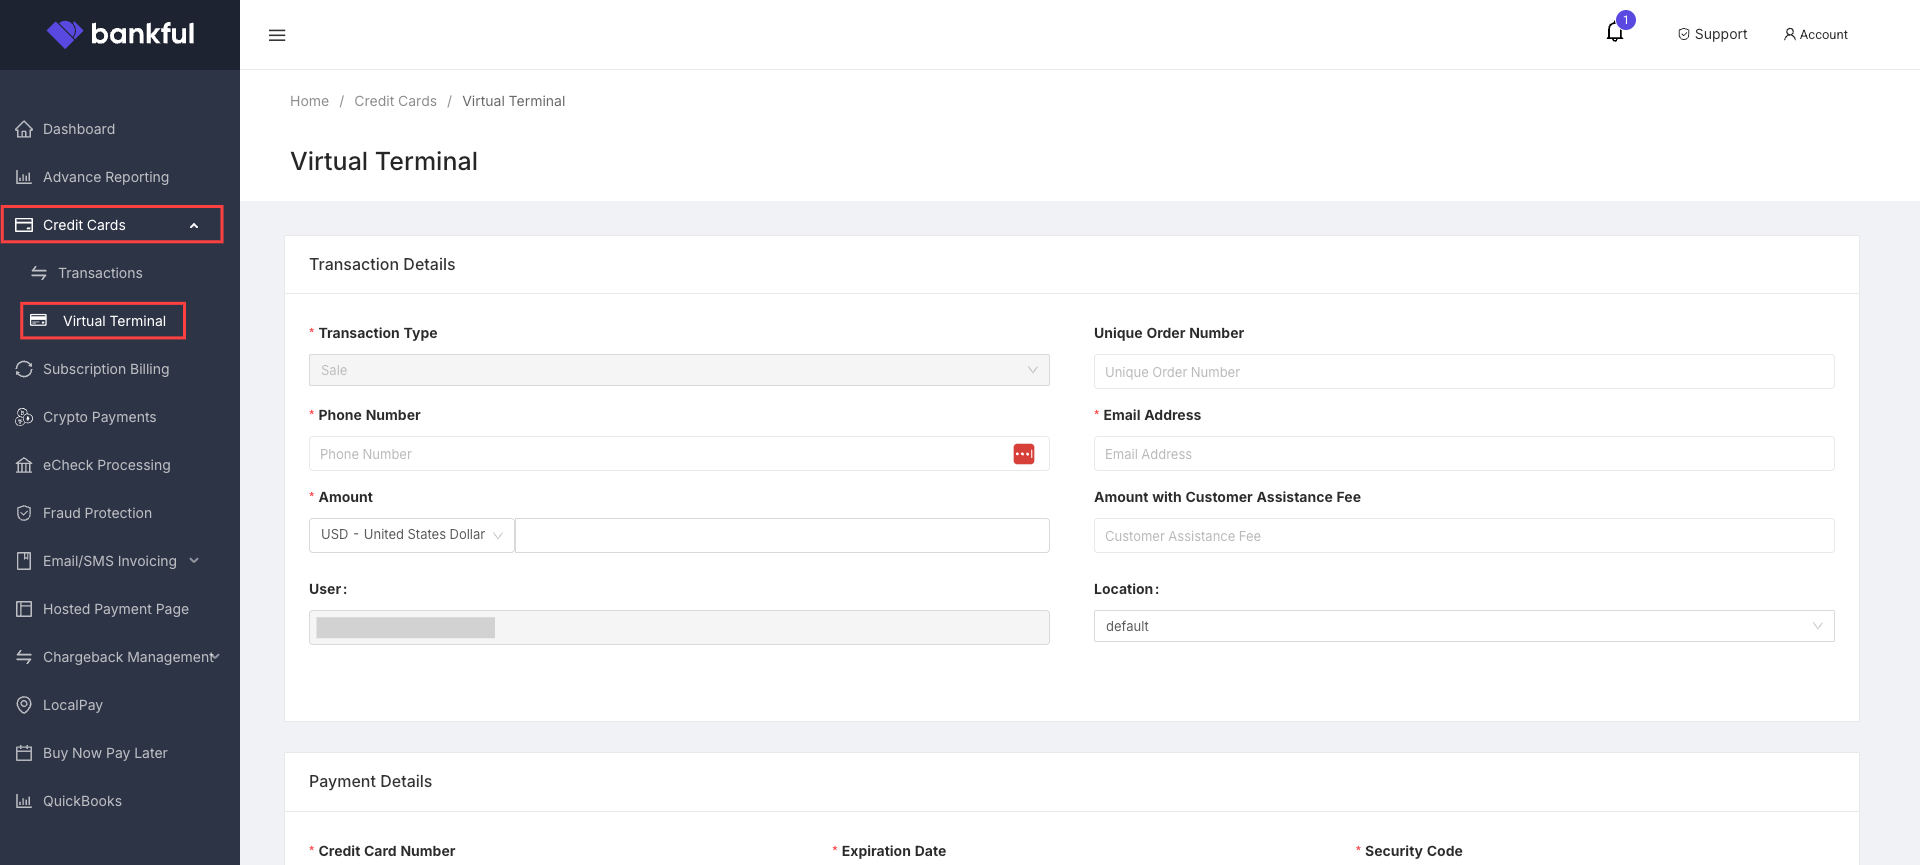
- Sign in to your Bankful Portal → Click Credits Cards (left sidebar) → Click Virtual Terminal
Virtual Terminal Sections
- Transaction Details
- Transaction Type
- The only option is Sale so this field is locked.
- Unique Order Number
- This field is not mandatory.
- You can tag a transaction with an identifier from your system. This is a number that is unique to your internal business records.
- The identifier can contain both numeric and alphabetical characters.
- The identifier should be no more than 200 characters.
- Phone Number
- This field is mandatory.
- Enter the customer’s phone number.
- Email Address
- This field is mandatory.
- Enter the customer’s email address. If the customer did not provide an email address, a placeholder address may be used (ex: test@test.com).
- Amount
- This field is mandatory.
- The currency options will depend on your processing bank’s capabilities and must be updated on the backend to show more than the default of USD. You can submit a ticket via your Bankful Portal, email support@bankful.com, or speak with your Sales Representative to add currencies.
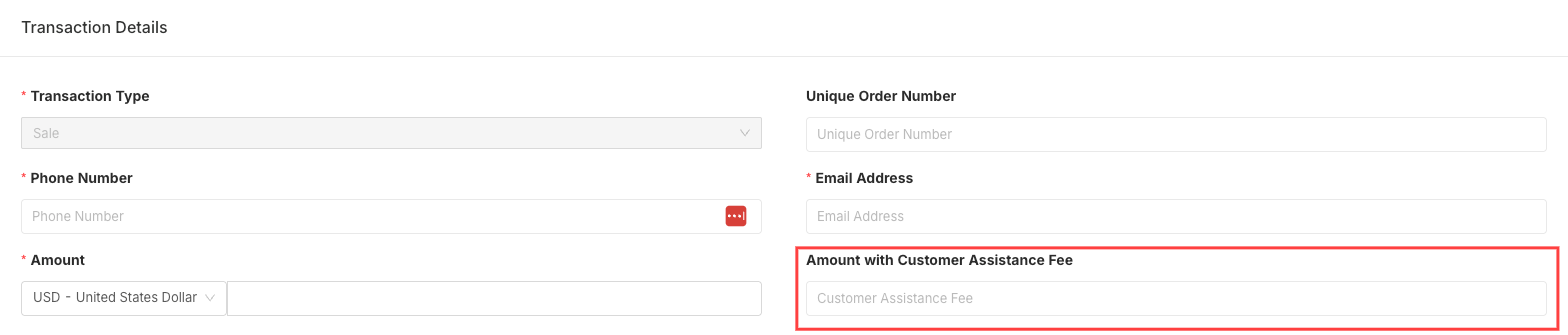
- Amount with Customer Assistance Fee
- This field is not mandatory.
- This is the total amount of the transaction your customer will be charged (original transaction amount plus the Customer Assistance Fee (CAF) listed within the CAF field of the Hosted Payment Page (HPP).
- Transaction Type
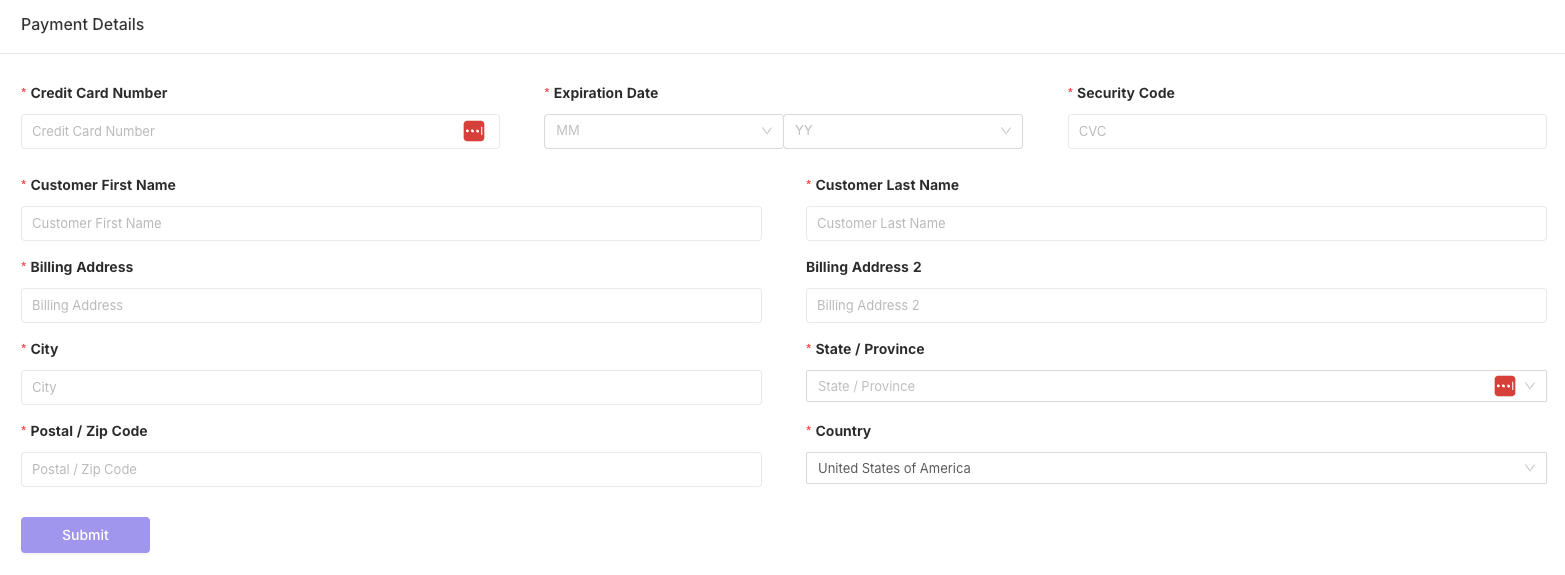
- Payment Details
- All fields will pertain to the customer’s credit card and information tied to that particular card.
- All fields are mandatory other than Billing Address 2.
FAQs
- What integration is this feature available for?
- All credit card and Square integrations.
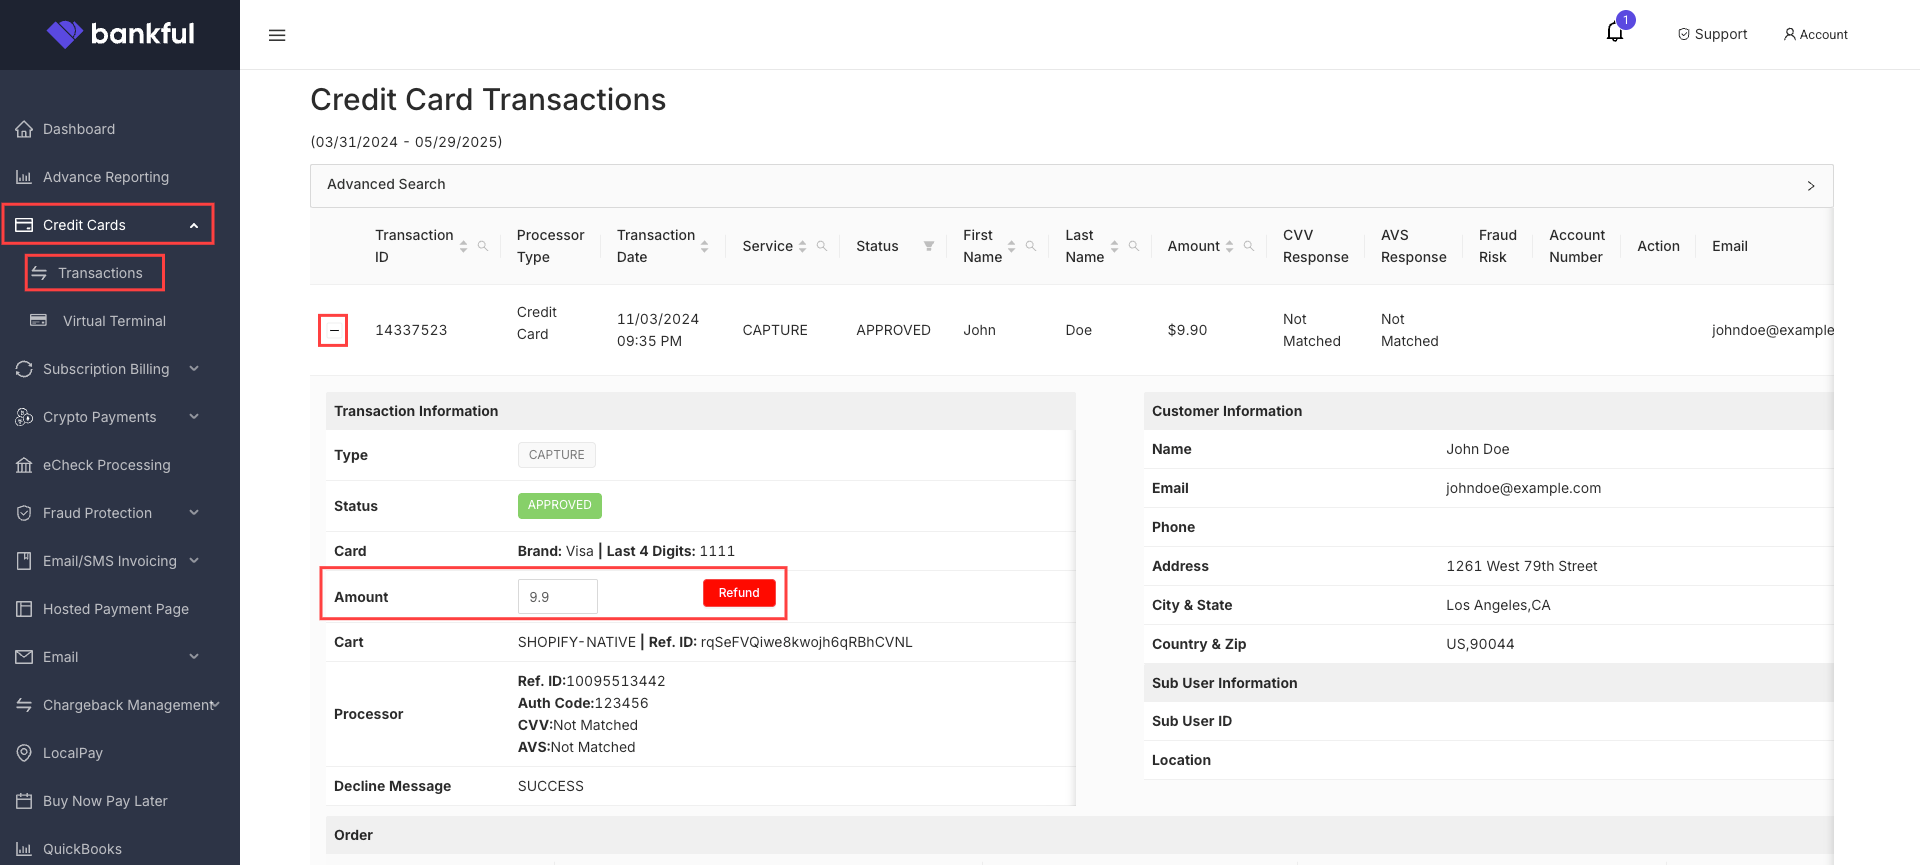
- How do I issue a refund?
- Log into your Bankful portal, click “Credit Cards,” click “Transactions,” select the date range, locate the proper transaction, click the “+” beside the transaction and then click “Refund” next to the amount.
- Log into your Bankful portal, click “Credit Cards,” click “Transactions,” select the date range, locate the proper transaction, click the “+” beside the transaction and then click “Refund” next to the amount.
- I have multiple MIDs, can I choose which MID I want to use to process a transaction?
- We currently do not have this ability, however, it is a future project we plan on completing.
- Can I issue a partial refund?
- Some transactions are eligible for a partial refund. This will depend on your particular set up. You can contact our support team via email at support@bankful.com or speak with your Sales Representative to learn more.
- Will my customer automatically receive a receipt after the transaction is processed?
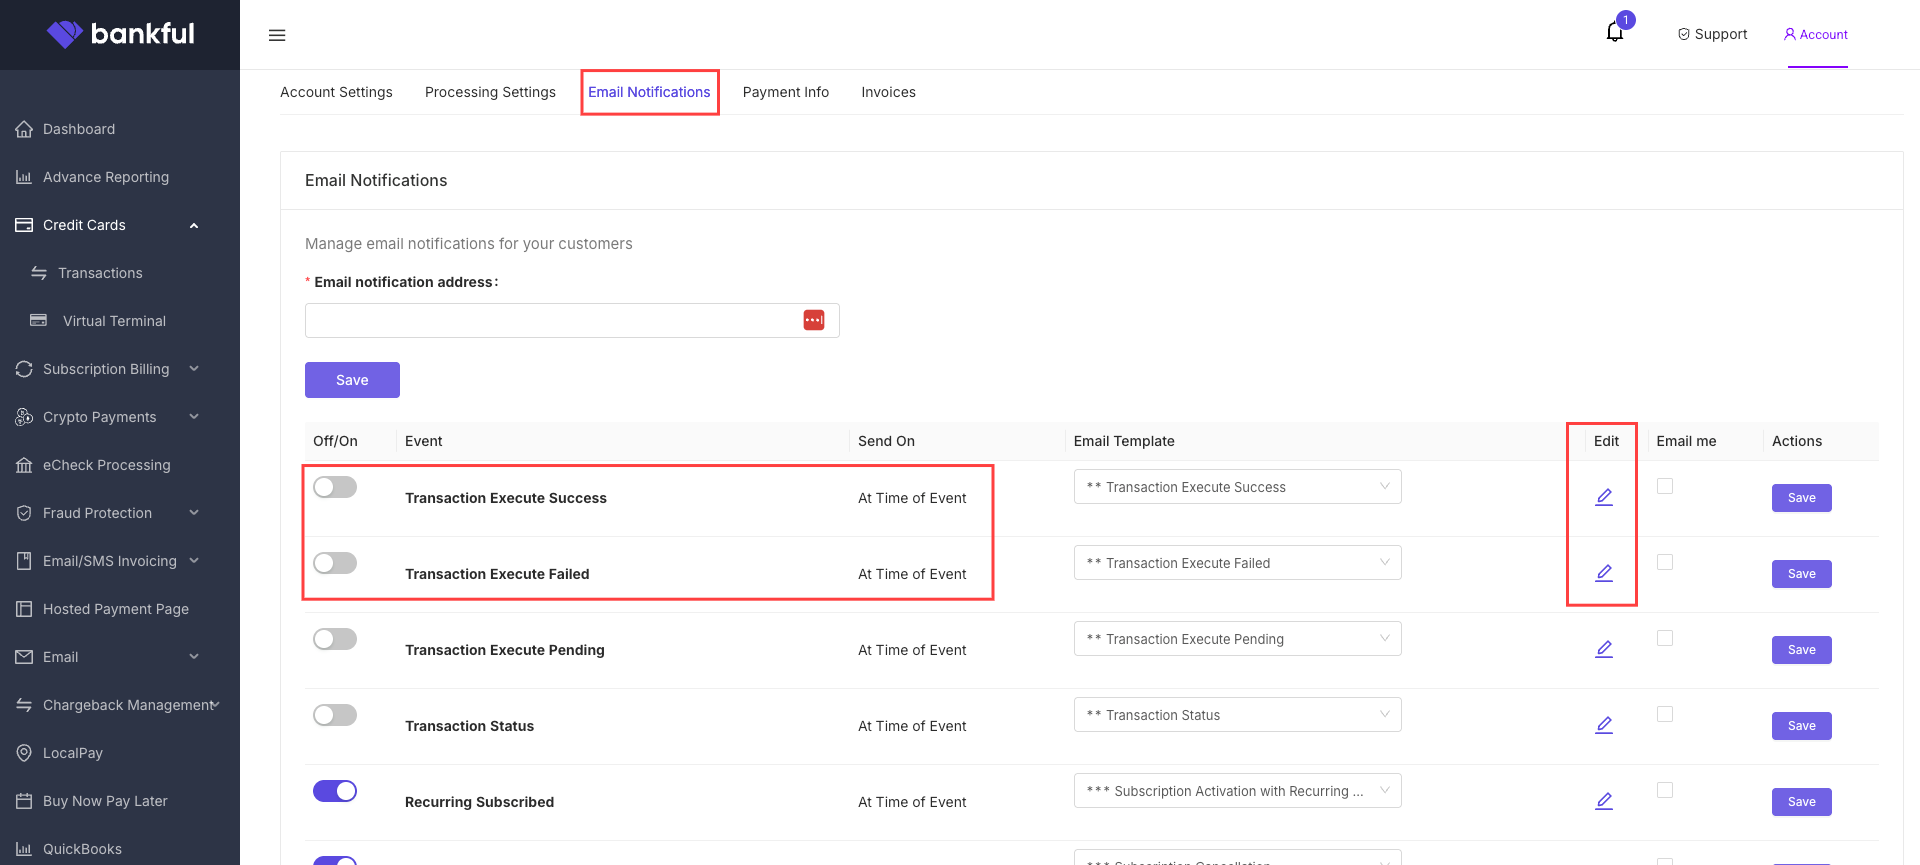
- Not at this time, however, the customer will receive a “Successful Transaction” or “Failed Transaction” email if these templates are turned on. To turn these on, sign into your Bankful portal, select “Account” in the upper right corner, click “Admin Console” from the dropdown, and then click “Email Notifications” from the top menu bar. You will then toggle on the first two options. You also have the ability to edit the email as you see fit by clicking the pencil icon on each template.
- Not at this time, however, the customer will receive a “Successful Transaction” or “Failed Transaction” email if these templates are turned on. To turn these on, sign into your Bankful portal, select “Account” in the upper right corner, click “Admin Console” from the dropdown, and then click “Email Notifications” from the top menu bar. You will then toggle on the first two options. You also have the ability to edit the email as you see fit by clicking the pencil icon on each template.
If you have any further questions or need assistance, please contact us at support@bankful.com
2.15.24