- This is a step-by-step guide on integrating Bankful into WooCommerce
- You will need a username and password for an active Bankful account to continue
- If you have not signed up for Bankful, please do so here
Integrating Bankful Into WooCommerce
The process begins when you receive the welcome email. You will get this email from support@bankful.com. If you have not received this email, please contact support@bankful.com or reach out to your sales representative.
- Download Plugin for Native Integration
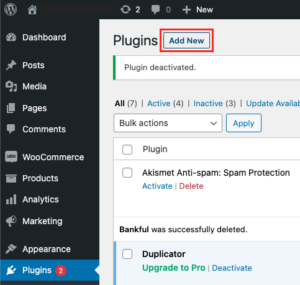
- Log into your store’s WordPress backend and click Plugins → “Add New”
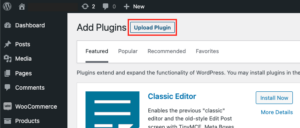
- Click “Upload Plugin”
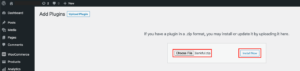
- Choose the extension zip file you downloaded during checkout and click “Install Now”
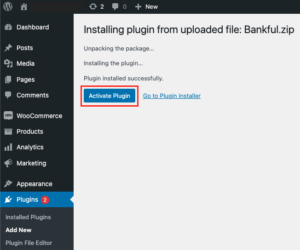
- Activate the Plugin
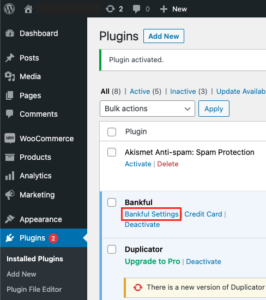
- Click “Bankful Settings”
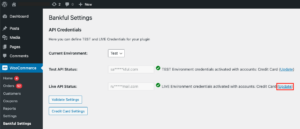
- Click “Update” on the Live API Status line
- Enter your Bankful credentials and click “Validate Settings” to connect the installation.
- LIVE API Username = Bankful Username
- LIVE API Password = Bankful Password
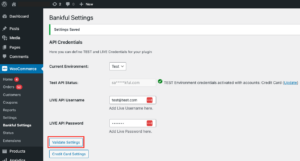
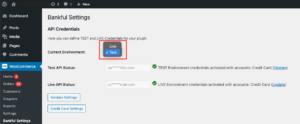
- You are still in “Test Mode” and can perform a test transaction if you wish. If you are satisfied with testing, click the dropdown menu and select “Live”
We strongly advise setting the Customer Email and Customer Phone Number fields to mandatory within Woo. This will help your processing bank verify transactions and help with future chargeback disputes.
If you encounter any difficulties during the installation process, our dedicated support team is ready to provide guidance. Support can be contacted at support@bankful.com.
5.13.24